


How to Sterilize and Store Infant Pacifiers Safely
Pacifiers bring instant comfort and calm to little ones. Whether you're easing fussiness, helping soothe your baby to sleep, or providing a gentle distraction, pacifiers play a quiet but powerful role in your baby’s daily routine. But just as important as the pacifier itself is how you clean and store it. Safe usage starts with proper hygiene.
Here’s your complete guide to keeping infant pacifiers and accessories clean, safe, and ready to use—at home or on the go.
Why Sterilization Matters
Babies explore the world through their mouths. Their immune systems are still developing, which makes it crucial to ensure anything that enters their mouths—especially pacifiers—is free of harmful bacteria and dirt. Even if it looks clean, a pacifier can still carry invisible germs, especially after it’s been dropped, handled, or stored incorrectly.
Proper sterilization and storage can help:
-
Prevent infections
-
Minimize exposure to dirt and dust
-
Keep pacifiers in good condition longer
-
Offer peace of mind for parents and caregivers
Step 1: First Use? Sterilize Immediately
Before your baby uses a new pacifier, always sterilize it. Boiling is one of the most reliable and natural methods:
-
Bring water to a rolling boil.
-
Submerge the pacifier (nipple facing up) for about 5 minutes.
-
Use clean tongs to remove it from the pot.
-
Place it on a clean towel to air dry completely.
The Calm n Cuddle pacifier is made from one-piece medical-grade silicone, which means it can withstand boiling and high temperatures without breaking down or releasing harmful chemicals.
Step 2: Daily Cleaning Routine
Even after sterilizing for the first use, pacifiers need to be cleaned regularly. Here’s a simple daily routine:
-
Wash with warm soapy water: Use mild, baby-safe dish soap. Rinse thoroughly to ensure no residue is left behind.
-
Dishwasher-safe: Silicone pacifiers and cubbies can be placed on the top rack of the dishwasher.
-
Air dry: Lay them on a clean, dry towel in a well-ventilated area, with the nipple facing up. Make sure they’re completely dry before storing or reusing.
This is especially important if your little one uses their pacifier all day, or if it’s clipped to their outfit during meals or playtime.
Step 3: Caring for Clips and Cubbies
Accessories like pacifier clips and cubbies are just as important to keep clean.
-
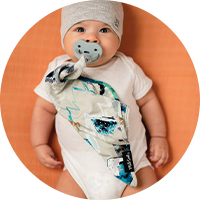
Clips: These prevent pacifiers from falling to the floor but can collect drool and dirt. Gently wipe them down with a damp cloth and mild soap. Let air dry completely before reattaching.
-
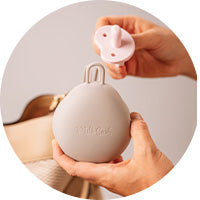
Cubbies: These soft silicone holders are designed to store 1–2 pacifiers. Since they often go in diaper bags, be sure to wash them regularly with soap and warm water. They can also be boiled or put in the dish washer for a deeper clean.
Both the clip and cubby are made with safety in mind—free of BPA, PVC, and phthalates, and crafted from materials that can handle everyday cleaning.
Step 4: Travel Smart
Whether you’re heading out for errands or an overnight trip, it’s important to take hygiene on the road. Follow these tips:
-
Keep a clean backup: Always carry more than one pacifier. If one drops on the floor and can’t be washed right away, having a spare can save the day.
-
Use a cubby: Store unused or freshly cleaned pacifiers in a secure, sealed holder that’s easy to wipe down. This prevents dust or crumbs from the bottom of your diaper bag from transferring to your baby's pacifier.
-
Clip it close: A well-designed pacifier clip keeps it from falling on the ground. Attach it to your baby’s onesie or stroller strap to reduce how often it needs to be washed.
Step 5: How Often Should You Sterilize?
Daily washing is often enough for everyday use, but here are moments when you should fully sterilize:
-
After an illness (fever, cold, etc.)
-
If the pacifier falls into dirty or unsanitary areas (public floors, car seats, etc.)
-
After long storage periods
-
Before giving it to a new baby (even siblings)
Sterilizing once or twice a week, in addition to daily washing, can provide an extra layer of protection, especially during cold and flu season.
Step 6: Drying and Storing
Moisture can lead to mold, so never store damp pacifiers in closed containers.
-
Allow full drying: Lay flat on a clean, dry cloth in a spot with airflow. Ensure the nipple is facing up so any water can drain out.
-
Use cubby: Once fully dry, place it inside the silicone cubby to keep it clean and protected from lint and crumbs.
-
Avoid plastic zip bags: These can trap moisture and lead to bacterial growth.
Storing in a cubby also keeps pacifiers organized and easy to find, especially in busy bags or overnight totes.
Step 7: Know When to Replace
Even with proper care, pacifiers don’t last forever. Silicone can wear down over time, especially with daily use and frequent sterilization.
Check your pacifier regularly for signs of:
-
Discoloration
-
Cracks or tears
-
Sticky or thinning texture
-
Loss of shape or firmness
It’s best to replace them every 4–6 weeks, or sooner if any wear and tear is visible.
Safety Reminders
-
Choose only pacifiers designed with a single molded piece to prevent choking hazards or trapped dirt in seams.
-
Make sure the shield includes ventilation holes, so airflow is maintained and skin doesn’t get irritated.
-
Always supervise when offering new pacifiers or accessories to ensure safe use.
Final Thoughts
Keeping your baby’s pacifier clean is a small task that brings big rewards—peace of mind, fewer germs, and more moments of calm. With a thoughtful routine and easy-to-clean accessories like soft silicone cubbies and durable clips, it’s simple to keep pacifiers hygienic and within reach, wherever the day takes you.
A little effort goes a long way. And a clean pacifier? That’s one more thing you can feel good about.
babe

